

Simple Bathroom Renovation: 10 Powerful, Impactful Tips
Transform Your Space: The Power of Simple Bathroom Renovation
A simple bathroom renovation can dramatically improve your home’s comfort, functionality, and value without breaking the bank. Whether you’re looking to refresh an outdated space or maximize a small bathroom’s potential, there are numerous affordable approaches to consider.
Quick Guide to Simple Bathroom Renovation:
| Renovation Type | Cost Range | Timeframe | Best For |
|---|---|---|---|
| Cosmetic Update | $300-$3,000 | 2-7 days | Quick refreshes (paint, hardware, fixtures) |
| Mid-Range Remodel | $3,000-$15,000 | 1-3 weeks | Layout preservation with new fixtures and finishes |
| Full Renovation | $15,000+ | 3+ weeks | Complete changes including layout changes |
Bathrooms are the most expensive rooms to remodel per square foot, but even modest updates can yield impressive results. As one homeowner noted after their budget-friendly renovation: “We love our new bathroom! The installers were professional and a dream to work with… we hardly knew they were even here.”
The psychological impact of a well-designed bathroom shouldn’t be underestimated. This space serves as both a functional necessity and a personal retreat. By focusing on strategic updates rather than complete overhauls, you can create a space that feels brand new without the overwhelming cost or disruption of a major renovation.
Why consider a simple bathroom renovation?
- Improved functionality through better storage and updated fixtures
- Improved aesthetic appeal with modern design elements
- Increased home value (bathrooms are key selling points)
- Better energy efficiency with updated lighting and ventilation
- Personalized comfort custom to your specific needs
Small changes can make big impacts – from updating grout color to replacing outdated hardware or adding strategic storage solutions.
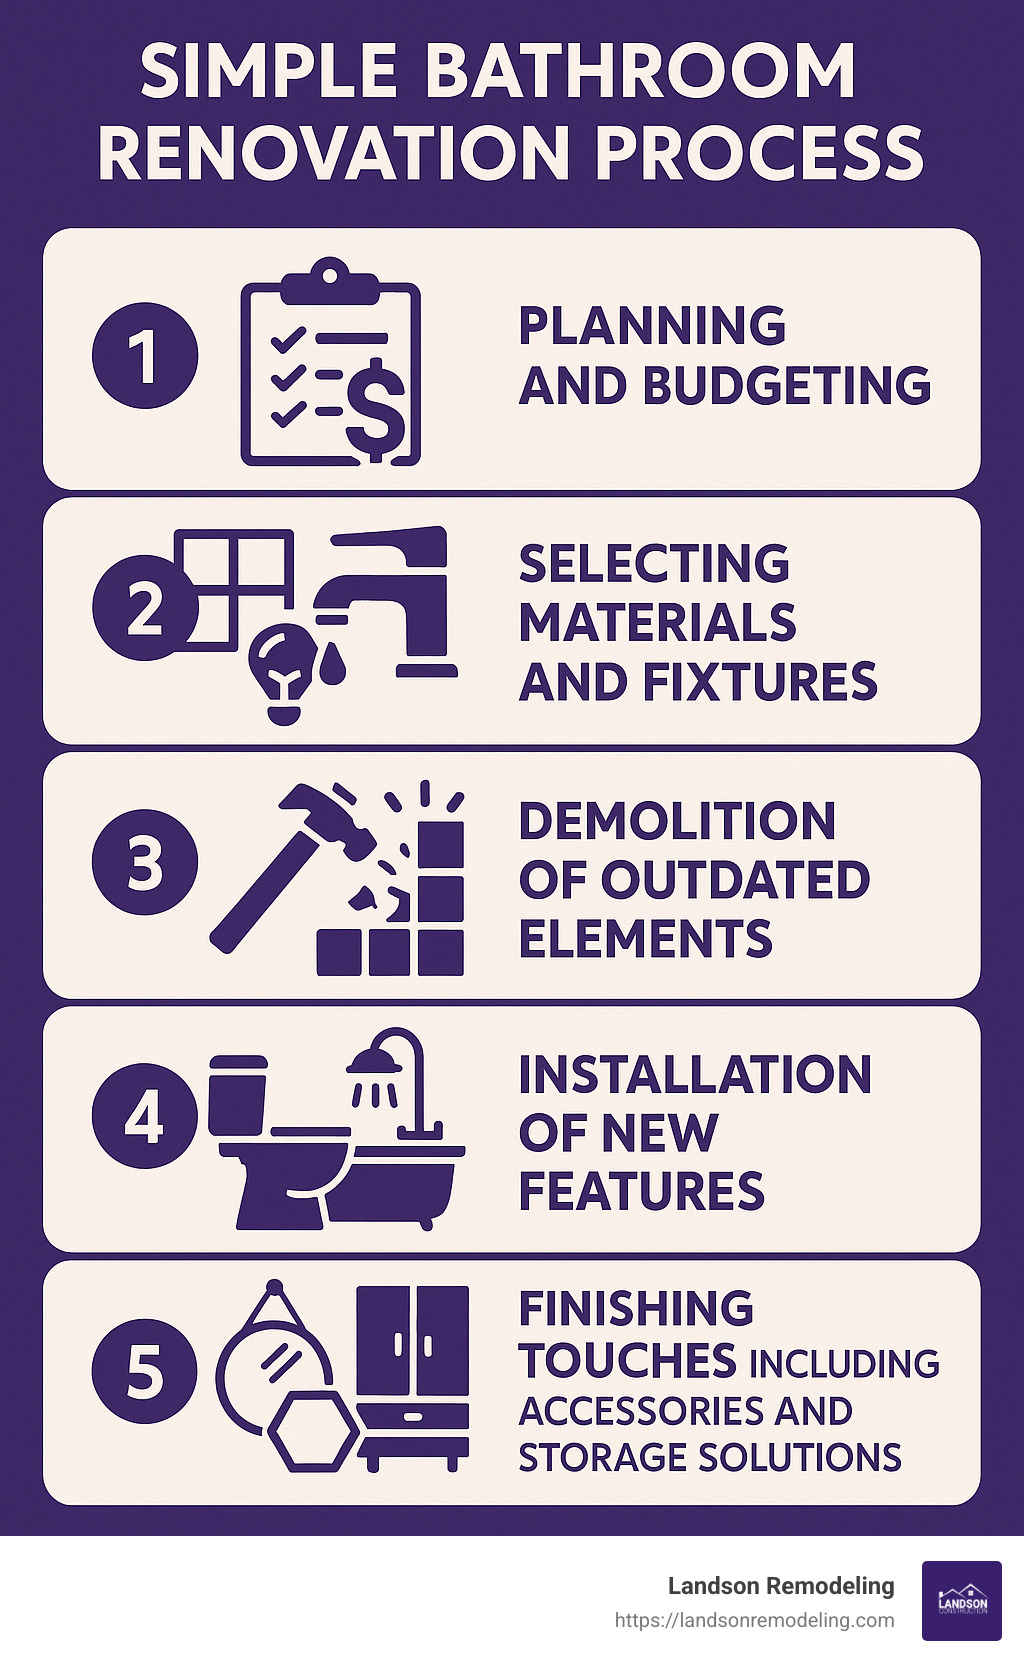
Simple bathroom renovation terms made easy:
– inexpensive ways to update bathroom
– simple bathroom designs for small spaces
– inexpensive bathroom makeover
Planning Your Simple Bathroom Renovation
The secret to a successful simple bathroom renovation isn’t fancy tools or expensive materials—it’s good old-fashioned planning. At Landson Remodeling, we’ve seen how proper preparation makes all the difference between a stressful project and a smooth change.
Plan and Budget
Remember when you were a kid and couldn’t wait to dive into a new project? That excitement is wonderful, but for bathroom renovations, take a breath first. Start by clearly defining what you want to accomplish and—just as importantly—how much you can realistically spend.
“I had the exact same problem as a lot of you,” one of our Minnesota clients recently told us. “I wanted a beautiful bathroom but didn’t want to spend $40,000 on a full remodel. By focusing on what mattered most, we transformed our master bath for just $950.”
A budget-friendly bathroom refresh can start as low as $300 for simple cosmetic changes. More extensive renovations typically run around $100 per square foot. When creating your budget, be sure to list your priorities first, then research material costs (don’t forget to look for sales and discounts!). Factor in labor costs, which typically account for 40-60% of your total budget, and always add a 10-15% contingency fund—because bathrooms have a funny way of revealing surprises once you start working on them.
Decide What’s Most Important
One homeowner put it perfectly: “Sometimes you just know” which elements need updating most. Trust your instincts, but also be practical about what’s truly essential.
In many bathrooms, the critical elements include outdated fixtures that have seen better days, poor lighting that makes your morning routine harder than it needs to be, inadequate storage leaving toiletries scattered everywhere, damaged flooring or walls showing signs of water issues, or an inefficient layout that makes your bathroom feel like a puzzle box.
By separating your “must-haves” from your “nice-to-haves,” you’ll make smarter decisions with your renovation dollars. For instance, keeping your plumbing fixtures in their current locations can save thousands, allowing you to splurge on that gorgeous vanity you’ve been eyeing.
Affordable Updates
You don’t need a millionaire’s budget to achieve a bathroom you’ll love. Some of our clients’ favorite high-impact, low-cost updates include:
A fresh coat of paint can completely transform your bathroom for about $40 per gallon. New cabinet hardware offers an instant update for around $4 per knob or pull. Choosing a stylish shower curtain instead of a glass door can save approximately $1,000. Consider refinishing rather than replacing your bathtub to save significantly. And peel-and-stick flooring can give you a fresh look without breaking the bank.
“9 times out of 10, a reasonable upgrade is worthwhile,” as one interior designer noted to us. This is especially true in bathrooms, where even small spaces provide opportunities to include special touches while staying in budget. That perfect faucet or statement mirror might be worth the splurge if you save elsewhere.
Minnesota homeowners face unique considerations for bathroom renovations, including our cold climate and regional style preferences. For more comprehensive information custom to our area, visit our bathroom remodeling in Minnesota resource page.
With thoughtful planning, your simple bathroom renovation can deliver remarkable results that you’ll enjoy every single day—without the stress of an over-extended budget or timeline. The most beautiful bathrooms aren’t always the most expensive ones—they’re the ones that perfectly match their owners’ needs and tastes.
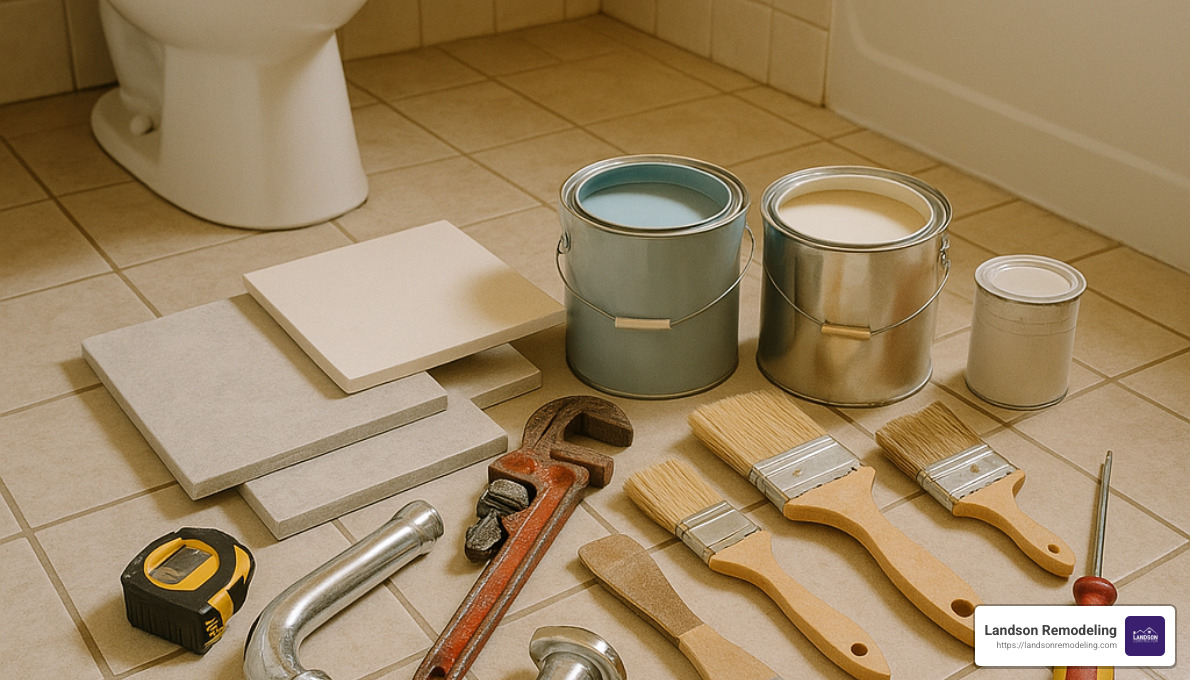
Essential Tools and Materials You Will Need
Let’s face it – starting a simple bathroom renovation without the right tools is like trying to eat soup with a fork. You’ll get frustrated fast! Having everything ready before you begin not only saves time but also keeps your project running smoothly and safely.
Safety Equipment
I can’t stress this enough – safety comes first! When you’re knocking down tile or sanding drywall, proper protection makes all the difference. At minimum, grab yourself:
Safety goggles to shield your eyes from flying debris (trust me, you don’t want grout chips in your eye!), a respirator or dust mask to keep those lungs happy, sturdy work gloves to prevent painful cuts and blisters, hard-toe shoes to protect your feet when that hammer inevitably drops, and ear protection when you’re running power tools. Your future self will thank you!
Tools
At Landson Remodeling, we’ve seen plenty of homeowners get stuck mid-project because they didn’t have the right tools on hand. For a successful simple bathroom renovation, you’ll want to gather:
For measuring and layout, you’ll need a reliable tape measure (get one that locks in place), a good level (nothing worse than a crooked vanity!), a stud finder to locate wall supports, and don’t forget a pencil and notepad for marking and notes.
When it comes to demolition, arm yourself with a solid hammer, a sturdy pry bar for removing trim and fixtures, a sharp chisel for precision work, a utility knife for cutting caulk and other materials, and possibly a reciprocating saw if you’re tackling larger projects.
For the installation phase, you’ll want a complete screwdriver set with both flathead and Phillips options, a drill with various bits (an absolute must-have), a wrench set for plumbing connections, reliable pliers, a caulking gun for sealing edges, paint brushes and rollers, a spackle knife for wall repairs, and a tile cutter if you’re installing new tile.
Don’t forget a voltage meter – this small tool can literally save your life before doing any electrical work!
Materials
What materials you’ll need depends on your specific project, but here are the basics that most simple bathroom renovations require:
For wall work, you’ll likely need drywall or cement board (especially important in wet areas), joint compound and drywall tape for seams, primer and paint in a satin or semi-gloss finish (these resist moisture better than flat paint), and mildew-resistant caulk for sealing edges.
For plumbing updates, gather your new plumbing fixtures like faucets and showerheads, plumber’s tape for leak-free connections, and various pipe fittings if you’re modifying any plumbing lines.
Electrical projects require GFCI receptacles (these are non-negotiable near water sources), new light fixtures if you’re upgrading, an appropriately sized exhaust fan to prevent moisture buildup, and the correct electrical wiring if you’re upgrading from standard 15-amp to the recommended 20-amp service.
For floors and walls, you’ll need your chosen flooring material, tile spacers if you’re tiling, grout and grout sealer to protect your investment, and transition strips for clean edges between different flooring types.
Finally, don’t forget the main attractions: your new toilet, vanity/sink, shower/tub, and all the hardware like towel bars and toilet paper holders that finish the space.
Cost-Effective Shopping
Your wallet doesn’t need to take a beating just because your bathroom is. Here’s how to shop smart:
Compare prices online by searching specific model numbers (and don’t forget to factor in shipping). Watch for sales and clearance items, especially when seasons change and stores make room for new inventory.
Floor models can be a goldmine – they often come with hefty discounts for minor imperfections you might not even notice. When buying materials like tile, ask about bulk discounts that can save you significant money. And don’t overlook larger chain stores that can offer better prices thanks to their volume purchasing power.
One of our clients shared a great tip: “I found my bath vanity on Craigslist from a local warehouse that buys returns and old stock, getting it for half price.” These kinds of creative solutions can transform your budget!
For tools you’ll use repeatedly in the future, investing in quality makes sense. But for specialized tools you might only need once, consider renting instead of buying. Your local hardware store likely has a rental program that can save you hundreds.
With the right tools and materials in hand, you’re well on your way to a successful simple bathroom renovation that won’t break the bank or leave you scrambling mid-project.
Simple Design Ideas to Transform Your Bathroom
A simple bathroom renovation is your opportunity to blend creativity with practicality. With just a few thoughtful design choices, you can transform your bathroom into a stylish and welcoming retreat without overspending.
Monochrome Tone
One of the most effective ways to open up a small bathroom is to choose a monochrome color scheme. Rather than mixing too many colors, using one main color (in different shades) creates a calm, unified look. White is always a timeless favorite because it feels fresh and clean, but don’t limit yourself—soft greys can provide a modern vibe, warm beiges create coziness, and soft blues hint at a spa-like escape.
The key to making a monochrome scheme work is consistency. When your walls, fixtures, and accessories all share variations of the same color, your bathroom looks intentionally designed and naturally spacious.
Add Plants
Nothing brings life into a bathroom quite like incorporating a bit of greenery. Plants are not only beautiful—they also help purify the air and improve relaxation. Even better, many houseplants thrive in the humidity typical of bathrooms.
Great options include easy-to-care-for plants like aloe vera (perfect for indirect sunlight), snake plants (which love lower lighting), pothos (able to adapt almost anywhere), and Boston ferns (which soak up moisture).
If your bathroom countertop or floor space is limited, think vertically with hanging planters or wall-mounted plant holders. Trust me, even one or two leafy additions can refresh your bathroom space dramatically.
Metallic Accents
Another simple trick to instantly lift your bathroom aesthetic is adding metallic finishes. Metals bring a touch of elegance, sophistication, and personality. Depending on your style, you might opt for brushed nickel for a modern feel, polished chrome for a timeless look, matte black for bold contrast, or brass for warmth and vintage charm.
Small metallic elements—such as faucets, cabinet hardware, towel bars, mirror frames, or lighting fixtures—can have a big impact. And here’s a budget-friendly tip from the pros: if you’re feeling crafty, consider using specialty spray paint on existing fixtures to match your new design. It’s an easy DIY upgrade that can save you hundreds of dollars!
Beadboard Wall Paneling
Adding beadboard paneling to your bathroom walls is a charming and practical way to add character and texture. It’s especially handy for covering imperfections and providing extra moisture resistance—crucial in any bathroom.
Traditional wood beadboard is sturdy and authentic but requires painting and sealing. If you’re looking for something easier to maintain, vinyl beadboard panels come pre-finished and water-resistant, while beadboard-look wallpaper is your most budget-friendly option.
You could even pair beadboard paneling halfway up your wall with a contrasting paint color or patterned wallpaper above it for a fresh, layered effect. It’s an easy DIY project that packs a big design punch.
Mirrors
Mirrors aren’t just practical; they’re also powerful design tools in your renovation toolkit. Adding or upgrading your bathroom mirror can instantly make your space feel brighter, larger, and more thoughtfully designed.
Swapping out a plain, builder-grade mirror for a framed or uniquely shaped one (think round, oval, or arched) immediately creates visual interest. Even better, placing a larger mirror or multiple mirrors strategically can amplify your space and reflect natural light beautifully.
Try positioning them across from windows, or consider adding mirrored cabinet doors for extra reflection. A thoughtfully placed mirror can truly transform even the smallest spaces.

Maximizing Space in a Simple Bathroom Renovation
If you’re renovating a smaller bathroom, especially common in older Minnesota homes, you’ll want to focus on creating the illusion of more space. Luckily, a few easy tips will make your bathroom feel bigger and brighter without requiring major structural changes.
First, go with light colors on walls, floors, and shower tiles. Lighter shades reflect more natural and artificial light, opening up the space visually. Semi-gloss or satin finishes are best—they’re moisture-resistant and reflect more light than matte paints. You can always add darker accent colors through smaller accessories to create depth without shrinking your bathroom.
Next, incorporate mirrors strategically to visually double your space. A large mirror behind the vanity, mirrored cabinets, or even multiple smaller mirrors placed to bounce natural light can truly transform your room. It’s one of the oldest design tricks around—and it still works beautifully.
Finally, accept a minimalist approach and stick to minimal accents. Less clutter means your space will feel bigger instantly. Opt for a few carefully selected statement pieces rather than lots of tiny accessories. Dual-purpose items, like decorative storage containers, help keep countertops clean and organized.
For more great tips specifically focused on budget-friendly updates, check out our guide on Inexpensive Ways to Update Bathroom.
Affordable Fixtures and Finishes for a Simple Bathroom Renovation
Updating bathroom fixtures and finishes doesn’t need to cost a fortune to have a big impact. With a few affordable swaps and upgrades, you can completely change your bathroom’s look and functionality.
A new faucet can easily lift your bathroom sink area. Installing one usually takes just 1-2 hours and budget-friendly options start around $50. For durability and longevity, look for faucets with ceramic disc valves, and consider water-saving models to lower your utility bills.
Another simple upgrade is changing out your cabinet hardware—the “jewelry” of your bathroom. At around $4 per piece, knobs and pulls are affordable and stylish updates that instantly refresh cabinets and drawers. For a cohesive look, match the hardware finish to your faucet and other fixtures.
Don’t underestimate the transformative power of fresh paint. With around $40 per gallon, it’s easily the most budget-friendly way to update your bathroom. Choose moisture-resistant paint (semi-gloss or satin), and don’t be afraid to use accent walls to add visual interest.
Lastly, consider your vanity—one of the central focal points in your bathroom. Painting existing cabinets is typically around $200-300, versus $500-2,000+ for purchasing a new vanity. If you do decide to buy new, look for models with integrated sinks and countertops, which can save you $1,200-1,500 compared to buying separately. Modern vanities are typically taller (around 34″), which can improve comfort and usability. Open shelving below the sink can also help your small bathroom feel more spacious.

With these creative yet simple design ideas and affordable upgrades, your simple bathroom renovation can become the inviting, refreshing space you’ve dreamed of—without overspending.
Step-by-Step Guide to Your Simple Bathroom Renovation
Starting on your simple bathroom renovation journey might feel a bit overwhelming at first, but breaking it down into manageable steps makes the process far less daunting. Here’s our tried-and-true Landson Remodeling guide to ensure your project runs smoothly from start to finish.
Demolition and Removal of Old Fixtures
You’ve planned and prepared, and now it’s time to get your hands dirty! Demolition can be satisfying (who doesn’t like safely swinging a hammer?), but it also requires caution and careful preparation.
Safety Precautions
Before you start removing fixtures, clear everything out of the bathroom, including personal items and decor. Cover any neighboring areas with plastic sheeting to prevent dust from spreading. Safety first, always—so grab your safety goggles, dust mask, sturdy work gloves, and closed-toe shoes.
Another pro tip we always share: keep a basic first aid kit and fire extinguisher handy—just in case!
Turn off Utilities
You definitely don’t want an unexpected indoor waterfall or electrical shock! Locate and turn off the water supply valves, typically found behind the toilet and under the sink. If these valves aren’t cooperating, shut off your home’s main water valve temporarily.
Turn on the faucets briefly to drain any remaining water from the lines. Then, switch off your bathroom’s electricity at the circuit breaker. Use a voltage tester to double-check that the power is indeed off (better safe than sorry!).
Removing Fixtures
Once utilities are safely off, start dismantling your fixtures. Begin by removing smaller items like towel bars, shelves, and accessories. Next up, tackle the toilet: disconnect the water supply, empty the tank by flushing, remove the mounting bolts, and lift the unit straight out. Plug the open drain with a rag to keep sewer gases at bay.
The vanity and sink come next. Disconnect water lines and drains, then carefully remove any screws or brackets securing it to the wall. Bathtubs and showers can be a bit trickier—remove shower doors, faucets, and drains first. You may need to remove tiles or drywall to access mounting brackets. Finally, remove any flooring or wall coverings needing replacement.
An important caution: before knocking down any walls or removing heavy features, double-check that you’re not dealing with load-bearing structures. When in doubt, consult a professional.
Updating Plumbing and Electrical Work
With demolition behind you, it’s time to tend to the critical (and hidden) aspects of your bathroom—the plumbing and electrical systems.
Plumbing Fixtures
Updating your plumbing now prevents headaches later. If your home still has older galvanized piping, consider upgrading to modern materials like PEX or copper for more reliable performance. Replace outdated shut-off valves with quarter-turn ball valves—they’re much easier to use and more reliable in emergencies.
Relocating fixtures, such as the toilet or shower, can significantly increase your renovation costs (usually by $2,000 or more). If budget is a priority, stick with your existing layout.
GFCI Outlets
Safety is critical in bathrooms, especially when it comes to electricity near water. Installation of Ground Fault Circuit Interrupter (GFCI) outlets is required by building codes and protects you from dangerous electrical shocks. Install them within six feet of any water source, such as sinks or bathtubs, and consider upgrading to 20-amp circuits to smoothly handle modern appliances like hair dryers and electric razors.
Lighting
Good lighting can brighten your mornings and create a relaxing evening atmosphere. We recommend combining different lighting types for the best balance. Ambient (overhead) fixtures keep the space bright, task lighting by mirrors helps with grooming, and accent lighting can highlight design features or artwork.
Consider swapping out outdated fixtures for energy-efficient LED models. Wall sconces placed on either side of the mirror eliminate awkward shadows, making shaving or applying makeup less stressful. Installing dimmer switches gives you total control over your bathroom’s vibe—bright and cheery or calm and soothing.
Don’t be afraid to express a little creativity, either. Nontraditional light fixtures—such as decorative pendants hung above a bathtub—can double as functional art.

Installing New Fixtures and Finishes
Here’s where your bathroom vision really starts to come alive, as you install fresh, new materials and fixtures that you’ve carefully selected.
Drywall Installation
Start by properly preparing your walls. Use moisture-resistant drywall—often called “green board”—in most bathroom areas. In showers and baths, install cement board with a vapor barrier behind it for extra moisture protection. Carefully tape and mud drywall seams, sanding them down for a smooth finish. A bathroom-specific primer will help your paint adhere better and prevent mildew problems later on.
Painting
Painting your bathroom is cost-effective and makes a huge visual impact. Choose a mildew-resistant paint specifically formulated for bathrooms, in a semi-gloss or satin finish that’s easy to clean and moisture-friendly. Paint after drywall installation but before adding fixtures, so you won’t need to worry about accidental splatters landing on your brand-new vanity or toilet.
Tiling
Tile adds durability, practicality, and style to your bathroom. Prepare your surface level and clean before applying a suitable underlayment. Use thin-set mortar and tile spacers to keep grout lines neat and consistent. Allow plenty of drying time before grouting, and don’t forget to apply a quality grout sealer afterward to keep your tiles looking great long-term.
Here’s a helpful tip: tile your shower or tub wall first, then the floor—so you won’t risk damaging your new floor as you work.
Installing Shower, Tub, Vanity, Toilet
Finally, the home stretch! Begin by installing your shower or bathtub first, making sure plumbing fixtures are properly connected and the area is well-waterproofed. Next, place and secure your vanity and sink, connecting both water supply lines and drains. Ensure your vanity is perfectly level and firmly anchored to the wall studs.
As for the toilet—good news! It’s one of the easiest bathroom fixtures you can install yourself. A wax ring ensures a watertight seal, and reconnecting the water supply is straightforward. Finish up by installing all the accessories like towel bars and toilet paper holders.
Taking your project step by step like this helps you feel more confident throughout your entire simple bathroom renovation process. And remember, if you ever get overwhelmed or unsure—our friendly team at Landson Remodeling is here to lend a hand and share our expertise!
Budget-Friendly Upgrades: Lighting, Ventilation, and Storage
In a simple bathroom renovation, it’s often the smaller updates that make the biggest difference. Lighting, ventilation, and storage are essential elements that can dramatically improve the comfort and functionality of your bathroom without straining your budget.
Lighting Fixtures
Improving your bathroom’s lighting can completely change its mood and usability. For vanity areas, sconces placed beside the mirror provide flattering, shadow-free light, perfect for getting ready each morning. For overall illumination, consider updating the current ceiling fixture—surprisingly affordable models can be found for as little as $24.99. And to add a touch of luxury, try accent lighting like LED strips beneath floating vanities or in recessed wall niches.
If you’re looking to keep costs even lower, refreshing your existing fixtures with a coat of spray paint can achieve a brand-new look without replacement. Or, add a dimmer switch (typically under $20) to give your bathroom lighting adjustable brightness. A simple upgrade like changing out your ceiling fixture or towel bar, while leaving existing countertops or tile intact, can breathe new life into your space without breaking the bank.
Exhaust Fans
Proper ventilation is crucial, especially in Minnesota’s climate, where moisture buildup can lead to mold and mildew. Exhaust fans not only protect your bathroom from moisture damage but also help remove odors and improve air quality.
When choosing a new exhaust fan, consider your bathroom’s size to ensure you select an adequately powerful model. Fans are rated by cubic feet per minute (CFM), so match this rating to your bathroom’s square footage (typically 1 CFM per square foot). Also, pay attention to the noise level, measured in “sones”—the lower the number, the quieter the fan.
Today’s exhaust fans come with handy features like humidity sensors, which automatically activate the fan when moisture levels rise, or even built-in Bluetooth speakers for a spa-like experience. Most importantly, make sure your fan vents directly outside—not into your attic—to effectively prevent mold. “Exhaust fans are the first defense against mold and mildew,” making them well worth the investment.
Open Shelving
Adding storage doesn’t have to mean bulky cabinets. Open shelving creates practical storage space while maintaining a clean, open feel. Floating shelves are particularly effective, providing storage without overwhelming the bathroom visually. For smaller spaces, glass shelves offer storage that’s almost invisible, keeping your room airy and spacious.
You might also explore creative ideas like ladder shelves that make excellent use of vertical space. One designer tip: an inexpensive decorative ladder is easy to repurpose as shelving for towels and toiletries. It adds character while improving functionality.
DIY Storage Solutions
For a truly personalized and budget-friendly touch, consider DIY storage options. Over-the-toilet shelving makes great use of typically wasted wall space, while door-mounted organizers help corral small items like hairbrushes and styling tools. Magnetic strips can hold grooming essentials like nail clippers or tweezers neatly within reach.
To keep smaller items organized, invest in drawer dividers or attractive baskets and decorative containers. These simple additions not only tidy up your bathroom but also add style and warmth to the space. For a modern convenience upgrade, consider adding drawer chargers—a thoughtful touch that makes mornings smoother by keeping your devices charged and neatly stored.
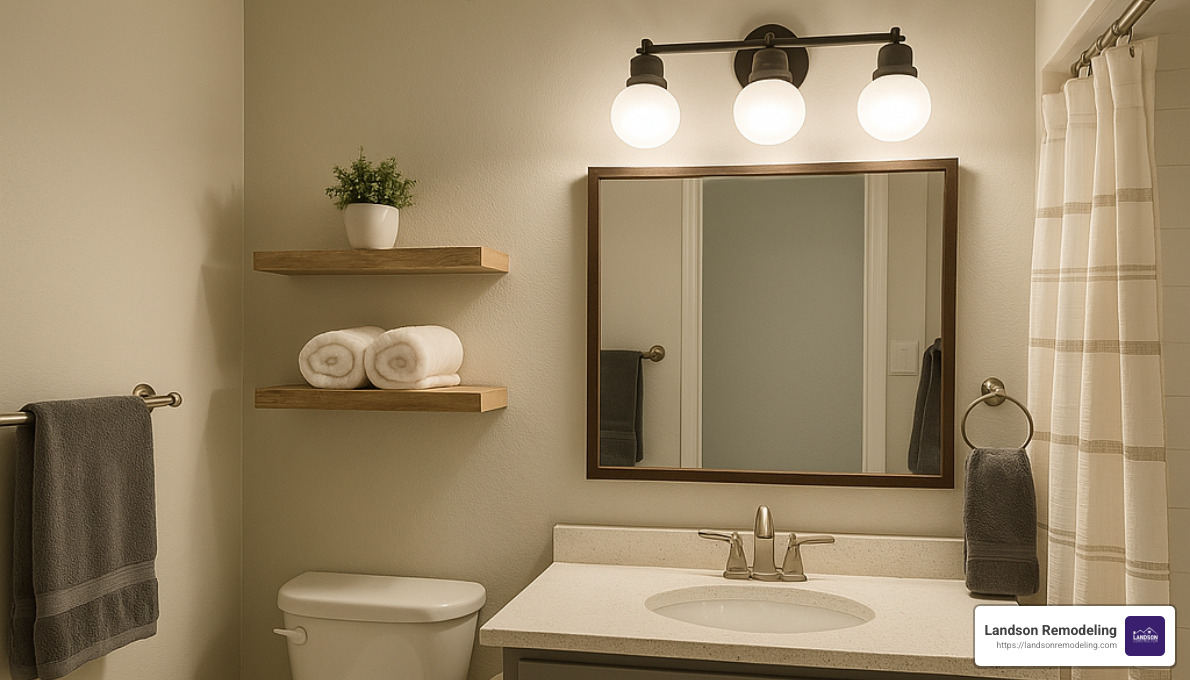
These budget-friendly improvements prove that you don’t have to spend a fortune to transform your bathroom into a beautiful and functional retreat. With thoughtful lighting choices, proper ventilation, and clever storage solutions, your simple bathroom renovation can easily become one of your favorite home improvement projects.
Improving Storage and Organization in Your Simple Bathroom Renovation
When it comes to your simple bathroom renovation, thoughtful storage is your best friend—especially here in Minnesota, where chilly winters mean you need space for extra towels, supplies, and cozy essentials. With a few thoughtful touches, you can easily create a bathroom that’s both functional and pleasing to the eye.
Floating Shelves
One of our favorite storage solutions at Landson Remodeling is floating shelves. These shelves attach directly to the wall, leaving floor space open (and making cleaning a breeze—bonus!). You can install floating shelves above the toilet, next to the shower, or even in those tricky corners you never quite knew how to use. Store extra rolls of toilet paper, fluffy towels, or your favorite bath products close at hand.
When installing floating shelves, remember a few key tips. Always attach them securely using proper wall anchors or directly into wall studs. Check that your shelves are level before tightening everything down, and consider weight limits depending on what you’ll be storing. For bathrooms, we especially recommend water-resistant materials like glass, treated wood, or composite options that stand up to humidity.
And here’s a pro tip: Including floating shelves during your simple bathroom renovation can also set you up for future accessibility upgrades. As one of our universal design experts points out, shelves strategically placed now can make future grab bar installations easier.
Vanity Storage
Let’s talk about the vanity—your bathroom’s storage superstar. Maximizing vanity storage makes mornings smoother and evenings calmer. Drawer organizers can turn messy drawers into tidy spaces where every small item has its place. Pull-out shelves mean no more blindly reaching into the back of cabinets. Door-mounted storage can hold hair products, brushes, or extra soaps conveniently out of sight.
A neat idea we recommend to our clients: install electrical outlets inside vanity drawers. Imagine simply opening a drawer to charge your electric toothbrush or razor. It’s a clever modern upgrade that makes daily life just a little easier.
When selecting a new vanity for your simple bathroom renovation, look for designs that prioritize practical storage. Drawers are often more accessible than doors, and built-in organizers save you money and hassle. Wall-mounted vanities can make small bathrooms feel spacious and airy, and for hidden bonus storage, consider toe-kick drawers at the bottom of your cabinets.
Over-the-Toilet Storage
Don’t overlook the space above your toilet—it’s prime real estate for storage! Whether you choose an enclosed cabinet to hide extra supplies or open shelving for a decorative touch, this area can hold towels, toiletries, and even small decorative pieces.
If you prefer a sleek, custom look, consider built-in niches or recessed cabinets. They blend seamlessly into your bathroom design, providing storage without visual clutter. Or, if space is tight, a combination unit with both open shelves and closed cabinets can give you the best of both worlds—easy-access shelves and tidy enclosed storage.
Another fun and creative way to boost storage during your simple bathroom renovation: Swap out a standard bathroom door for a sliding barn-style door. This frees up the space that would normally be blocked by a swinging door, giving you extra room for storage shelves, cabinets, or even decorative accents.
For even more inspiration on maximizing your bathroom’s wall space, don’t miss our helpful guide on bathroom wall remodel ideas. With a little creativity, you’ll find numerous ways to make any small bathroom feel spacious, organized, and beautifully put together.
Frequently Asked Questions about Simple Bathroom Renovations
What are the essential tools and materials needed for a simple bathroom renovation?
Before diving into your simple bathroom renovation, it’s important to have the right tools and materials on hand. First and foremost, safety should always be a priority. Make sure you have safety goggles, a dust mask or respirator, sturdy work gloves, and hard-toe shoes to keep you protected during the project.
When it comes to basic renovation tools, a few must-haves include a tape measure, level, hammer, pry bar, screwdrivers (both Phillips and flathead), utility knife, pliers, adjustable wrench, and a caulking gun. For more complex projects—like installing new tiles or fixtures—you’ll benefit from having a drill with various bits, tile cutter, reciprocating saw, and voltage tester handy.
The materials you’ll need will vary depending on your project’s specifics, but some common essentials are moisture-resistant drywall or cement board, joint compound, drywall tape, waterproof caulk, primer, and bathroom-friendly paint. For plumbing updates, stock up on plumbing fixtures, supply lines, and plumber’s tape. If flooring updates are part of your plan, you’ll likely need flooring material (such as tile or vinyl), underlayment, and mortar and grout if you’re tiling.
As our renovation experts often say, “Preparation is half the battle.” Having everything ready before you start will save you from unnecessary trips to the store and keep your project running smoothly.
Still looking for affordable renovation ideas? Take a look at our guide on inexpensive ways to remodel a bathroom to keep your budget in check.
How can I plan and budget effectively for a bathroom renovation?
Planning and budgeting are the backbone of every successful simple bathroom renovation. To start, determine what’s most important to you—your “must-haves” versus your “nice-to-haves.” Ask yourself: Which items absolutely have to change? Which elements just need a cosmetic refresh?
Next, you’ll want to allocate your budget wisely. Typically, labor costs account for around 40-60% of your total renovation expenses, while materials will take up approximately 30-40%. Don’t forget to set aside about 10-15% as a contingency fund—unexpected surprises happen more often than you might think!
Keeping your existing plumbing layout can significantly cut down on costs, as can refinishing or repurposing existing fixtures like bathtubs, cabinets, or tiles. Be savvy with your shopping—look for sales, clearance items, or even second-hand fixtures that still fit your vision. And remember, DIY tasks such as painting, hardware updates, and demolition can help stretch your renovation budget even further.
When it comes to scheduling, set realistic expectations. Simple cosmetic updates might take anywhere from 2 to 7 days. A mid-range remodel usually spans 1 to 3 weeks, while a full renovation can stretch to 3 weeks or more. Factors such as delivery times, contractor availability (particularly in busy Minnesota renovation seasons), and drying or curing times between steps.
As one of our experienced project managers likes to say, “Most renovations take longer and cost more than initially planned—but thorough planning helps you avoid unnecessary stress and surprises.”
What are some budget-friendly tips for a simple bathroom renovation?
You don’t have to spend a fortune to achieve a beautiful simple bathroom renovation. With a little creativity and planning, you can transform your bathroom on a budget.
DIY tasks can significantly lower your renovation costs. Simple projects like painting walls, installing cabinet hardware, swapping out towel bars, or doing basic demolition can be easily tackled by homeowners—even beginners. Tasks like basic tiling can also be DIY-friendly, provided you’ve got the patience and the right tools.
Another wallet-friendly tip is to reuse or refresh existing fixtures. For example, refinishing a cast iron tub can cost significantly less than buying a new one. Painting cabinets instead of replacing them or reglazing ceramic tiles rather than tearing them out are also great strategies. A grout pen is a surprisingly inexpensive way to refresh the look of your tiles!
Choosing affordable, yet stylish alternatives for materials can also help your budget. Consider peel-and-stick flooring as an easy alternative to ceramic tiles. Opting for a shower curtain instead of glass doors can save you around $1,000. Stock vanities, porcelain tiles that mimic high-end materials, and modern laminate countertops offer savings without sacrificing aesthetics. Even something as simple as installing a new shower door can be done for as little as $300 and completed within a few hours.
As one of our happy clients once shared, “By tackling some tasks ourselves, refinishing old fixtures, and sticking with the existing layout, we ended up saving thousands—yet our bathroom feels brand new!”
For even more inspiration on changing your bathroom affordably, explore our inexpensive bathroom makeover resource page.
Conclusion

A simple bathroom renovation strikes the perfect balance between making a big impact and staying within your budget. Throughout this guide, we’ve explored how small, thoughtful changes can dramatically improve your bathroom’s appearance, functionality, and overall feel—without the hassle or high costs of a full remodel.
Thoughtful planning is the cornerstone of any successful renovation. Take time upfront to clearly set your priorities, plan your budget realistically, and create a detailed timeline. Doing this first helps you avoid costly surprises and unnecessary stress later.
Even minor updates can make your bathroom feel brand-new. Something as simple as refreshing your grout color, adding stylish cabinet hardware, or incorporating clever storage solutions can truly transform the space.
To make the most of your renovation, focus on high-impact elements—updating outdated faucets, improving lighting fixtures, or applying a fresh coat of paint. These areas are affordable to refresh yet instantly give your bathroom a modern, inviting feel.
Balancing DIY tasks with professional help allows you to stretch your budget wisely. While painting walls or installing new towel racks can be easy weekend projects, leave plumbing, electrical work, and complicated installations to the pros. Knowing where to invest in expert help ensures your simple bathroom renovation lasts for years to come.
Most importantly, think long-term. Choose materials and designs that won’t quickly go out of style, and consider future needs—like installing blocking for grab bars—especially if you plan to stay in your home long-term.
At Landson Remodeling, we understand the unique challenges and opportunities that come with renovating Minnesota bathrooms. Our region’s harsh winters and humid summers require special attention to durable, moisture-resistant materials and proper ventilation. Whether you’re changing a cozy powder room in St. Paul, enhancing your family bathroom in Duluth, or refreshing a master bath in Rochester, we’re here to ensure your renovation withstands our climate and improves your daily comfort.
One Minnesota homeowner shared their excitement after completing their bathroom renovation with our team: “The crew was incredibly professional and hardworking. Everything was done exactly how we planned, and the results are better than we imagined. We absolutely love our new bathroom!”
Your bathroom should be more than just a practical space—it should be a room that brightens your daily routine, offers relaxation, and boosts your home’s value. By choosing a simple bathroom renovation, you’ll achieve all these goals without the disruption, expense, or hassle of a complete overhaul.
Ready to bring your bathroom vision to life? At Landson Remodeling, we’re dedicated to helping you craft the beautiful and functional bathroom you deserve. Explore more info about our bathroom remodeling services to learn how we can support you every step of the way.
So go ahead—start your renovation journey. A fresh, inviting bathroom is closer (and easier!) than you think.
For some general background on bathrooms, check out Wikipedia’s article about bathrooms.


